Hello all! Hope you had a wonderful weekend! My Dad came down and we got a TON done in the dining room – I am so excited about it! And yesterday I worked on a quick project that I’ve been dreaming up for a while.
I had a light installed over my DIY craft table in the basement so I could have some task lighting when I needed it. I’ve been trying to think of something fun and funky and that I could DIY to put over it, and I found my inspiration in this Ballard Designs orb light:
But yeah, the small version is $400 – I don’t need a $400 light hanging over the craft table. :)
Thing is, I wanted something a little more funky and less pretty anyway. I’m going in a kind of cool, slightly industrial look for the basement and this one doesn’t really fit.
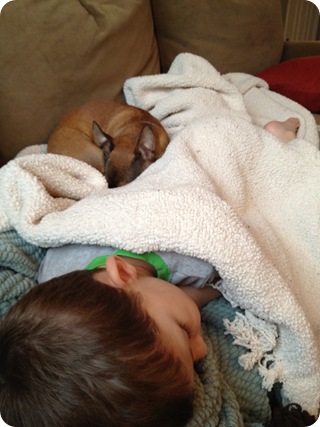
So I came up with a different version that was a lot cheaper and that I think is a little more rustic. I started it last night because I was on the sofa all day with a very sick boy:
:( He’s NEVER sick so it was a rare chance to cuddle on the couch for hours. After he fell asleep I started this project. It was easy and I didn’t have to move off of my booty for most of it. :)
I had gathered my supplies weeks ago, and they really only consisted of embroidery hoops. I got the two biggest sizes I could find – from Michael's and Hobby Lobby. I drilled two holes in each one:
The holes are directly across from each other, you’ll see why in a minute. And forgive the pics – they were taken at night with my cell. :)
I should mention I used the inside part of the embroidery hoops, without the hardware on them.
I matched up the holes and created an “orb” shape:
Then I realized it looked more like a pumpkin than the look I was going for – so I put the smaller embroidery hoops I had together in the same way. I put that one orb inside the bigger one and then hunted down a couple long screws to secure them together on both sides:
When I was done I had used five large hoops and four small ones to create my orb:
My vision was coming together. :)
Next I installed the light fixture kit I found at World Market a few weeks ago:
It was $12 and it came in a silver finish, so I spray painted it an oil rubbed bronze (ORB) color and then the hoop contraption ORB as well.
My orb is ORB. Har! (Oh it was begging for it.)
A first I was trying to find an old brass chandelier to put in the middle of it like the Ballard version, but I couldn’t find one and figured in the end I wanted it a little funkier anyway, so I found one of those Edison bulbs at Lowes and my funky, rustic orb light fixture was complete:
Initially I stared at it for what felt like hours to figure out how to get the cord attached to the hoops. I finally decided I was way over thinking it and just sat a couple of the hoops on the actual fixture:
I’d like to have it hang into the center a bit more, but until brilliance strikes I’m happy with how this looks!
You can see it here a bit better:
The fixture doesn’t get hot and the hoops don’t move unless I move them, so it will be fine just as is.
I gotta say, I’m in love with it! I think it’s totally hip and cool and I LOVE the side views:
Isn’t that pretty?
It gives of plenty of light, and the bulb is more of a pretty, subdued light:
I’m hoping the cord straightens out cause that is driving me a little batty, but I know with time it will:
You can see we’ve had a bit more progress with the basement – we have (some) doors. Just a few, cause a couple are on special order. More on that soon.
It’s so funny how a couple doors can make the space feel so finished though – every little update we make feels HUGE.
So my orb ORB light (OK, that never gets old…for me) that measures about 14 inches around was $23 bucks – it’s about ten inches smaller than the Ballard version, but that one was too big for this spot anyway. And at $23 instead of $400, well, I’ll take it. :)
And if I ever feel like changing it out, which is not unusual around here, it won’t be a big deal. I think the orb is cool just on it’s own as an accessory too – I could see it on display somewhere. I dig it!


0 comments:
Post a Comment